 (Image via
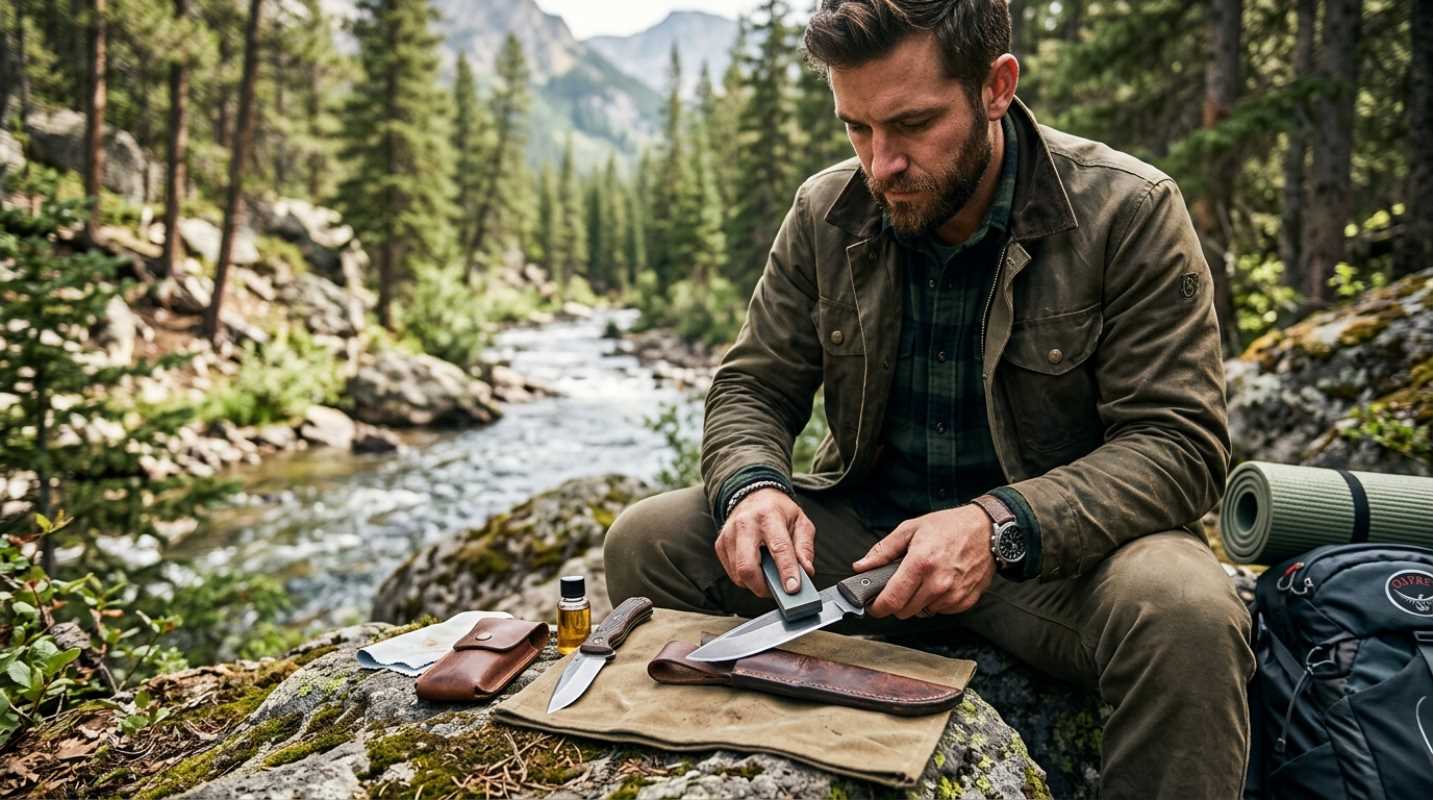
A dull knife is more than just a frustration; it is a safety hazard. A blunt blade requires more force to use, which increases the chance of it slipping and causing an injury. A sharp knife, on the other hand, is a joy to use. It glides through materials with precision and control, making tasks easier, faster, and safer. While there are countless electric sharpeners and pull-through gadgets on the market, the oldest and most effective method for putting a razor edge on a blade remains the humble whetstone.
Learning to use a whetstone is a skill that connects you to generations of craftspeople. It is a meditative process that turns a chore into a satisfying ritual. There is a profound sense of accomplishment in taking a dull, battered blade and bringing it back to life with your own hands. It might seem intimidating at first, with all the talk of angles, grits, and burrs, but the fundamentals are surprisingly simple.
Forget the idea that you need to be a master chef or a seasoned woodworker to master this skill. With a little patience and the right technique, anyone can learn to achieve a wicked-sharp edge. This guide will walk you through the process, demystifying the art of whetstone sharpening and giving you the confidence to keep all your blades in peak condition.
Choosing Your Whetstone
Before you can sharpen anything, you need the right stone. Walking into a store or browsing online can be overwhelming, as you will see stones made from natural materials, synthetic ceramics, and even diamonds. For a beginner, the best and most common choice is a two-sided synthetic water stone. These stones use water as a lubricant and typically feature two different grits, or levels of abrasiveness, on opposite sides.
Grit is measured in numbers. A lower number (like 400) indicates a coarse grit, which is used for repairing chips or re-shaping a very dull blade. A higher number (like 1000 or 3000) indicates a fine grit, used for refining and polishing the edge to razor sharpness. A great starting point for most people is a combination stone with a 1000 grit side and a 3000 or 6000 grit side. The 1000 grit does the heavy lifting of establishing the edge, while the higher grit side refines it to a polished finish.
The other key consideration is whether you are using an oil stone or a water stone. While oil stones are traditional, water stones have become more popular because they are cleaner, cut faster, and are easier to maintain. As the name implies, a water stone needs to be soaked in water before use. You will know it is ready when it stops releasing air bubbles, which usually takes about 10-15 minutes. This water acts as a lubricant, floating away the tiny metal particles (called swarf) that are removed from the blade, preventing them from clogging the stone's surface.
Finding And Maintaining Your Angle
This is the part that scares most beginners, but it is far more intuitive than it sounds. The key to a sharp knife is creating a consistent, V-shaped bevel on both sides of the blade's edge. To do this, you must hold the knife at a steady angle as you pass it across the stone. For most kitchen knives and everyday carry knives, this angle is somewhere between 15 and 20 degrees.
So, how do you find 20 degrees without a protractor? Here are a few simple tricks:
- The Matchbook Method: A standard book of matches, when placed on its side, creates an angle of about 20 degrees. You can place one on your stone and rest the spine of your knife on it to get a feel for the proper angle.
- The 90-45-22.5 Trick: Hold your knife perpendicular to the stone (90 degrees). Tilt it halfway to the stone (45 degrees). Tilt it halfway again (about 22.5 degrees). That is your ballpark angle.
- The Sharpie Trick: This is the most foolproof method. Use a permanent marker to color in the entire edge bevel on both sides of the knife. As you start sharpening, you can check your progress. If you are only removing the marker from the very tip of the edge, your angle is too high. If you are only removing it from the "shoulder" behind the edge, your angle is too low. When the marker is being removed evenly from the entire bevel, you have found the perfect angle.
Consistency is more important than precision. It is better to hold a steady 22-degree angle than it is to wobble between 15 and 20 degrees. Your muscle memory will develop over time, and soon you will be able to find the angle by feel alone.
The Sharpening Stroke
With your stone soaked and your angle in mind, it is time to make some steel sing. Start with the coarser grit side of your stone (e.g., 1000 grit). Place the stone on a damp towel or a non-slip base to keep it from sliding around.
Place the heel of the knife (the part of the blade closest to the handle) on the stone at your desired angle. With light but firm pressure, push the knife away from you, as if you are trying to shave a thin slice off the top of the stone. As you push forward, sweep the knife sideways so that you sharpen the entire length of the blade, from the heel to the tip, in one smooth motion. When you reach the tip, lift the knife and bring it back to the starting position.
There are many different strokes people use, but this simple "edge-leading" stroke is easy for beginners to learn. The key is to maintain that consistent angle throughout the entire movement. Do about 10-15 strokes on one side of the blade. As you work, a dark paste of water and metal filings, called a slurry, will form on the stone. Do not wipe this away! This slurry actually helps with the sharpening and polishing process.
Raising And Removing The Burr
How do you know when one side is done? You are looking for something called a "burr." A burr is a tiny fringe of metal that forms along the apex of the edge as you grind one side. It is a sign that you have removed enough material to create a new, thin edge.
To check for a burr, carefully run your thumbnail or the pad of your finger up the side of the blade you were not sharpening. You should feel a tiny, rough lip right at the edge, that is the burr. It should feel like catching your nail on a microscopic wire. Once you can feel a burr along the entire length of the blade, it is time to flip the knife over and sharpen the other side.
Repeat the exact same process on the second side. Use the same number of strokes and the same consistent angle. Your goal now is to raise a burr on this opposite side. When you have sharpened the second side, you will have effectively pushed the burr from the first side off and created a new one. The final step is to remove this last burr. To do this, perform a few alternating strokes, one on each side of the blade, using very light pressure. This gently refines the apex and knocks the burr off, leaving a clean, sharp edge.
Refining And Finishing The Edge
At this point, your knife should be functionally sharp. You can test it by carefully slicing a piece of paper. If it cuts cleanly without snagging, you have succeeded. However, to get that truly screaming, polished edge, you need to move to the finer grit side of your stone (e.g., 3000 or 6000 grit).
The process on the fine-grit stone is identical to the coarse-grit side, but your focus should shift from removing metal to polishing the edge. Use much lighter pressure, just the weight of the knife itself is often enough. Repeat the process: perform 10-15 strokes on one side, then 10-15 on the other, followed by a few alternating strokes to remove the very fine micro-burr that forms.
After polishing on the fine stone, your knife's edge should be mirror-like and incredibly sharp. The final step in the process is stropping. You can do this on a leather strop, the back of an old leather belt, or even a piece of cardboard. Simply drag the knife backward (spine-first) along the surface a few times on each side. This cleans off any remaining microscopic debris and aligns the edge perfectly, taking it from sharp to scary sharp. Clean and dry your knife and your stone, and you are done.